
Autodesk Maya has many powerful tools to create your own carpet. I find simple way to make a rug in Maya that is also compatible with any render engine. In this free Maya tutorial we will see a simple and effective tecnique to build your own realistic carpet in Maya and Mental Ray using polygon modeling, mental ray proxies and simple mel scripting. Enjoy the carpet creation in Maya!
TYPE: Free maya tutorial
CATEGORY: Modeling, Render Maya, render Mental Ray
INTRO
Are you tired of boring carpets made of fast textures and bump maps?
If so you are going to learn a fast and powerful way to create REAL carpets in Maya and Mental Ray.
Forget about heavy dispalcement maps and slow fur/hair computation... your going to build a very optimized and fasst renderable carpet!
Don't you believe me? Just follow my tutorial and enjoy your own personal carpet!
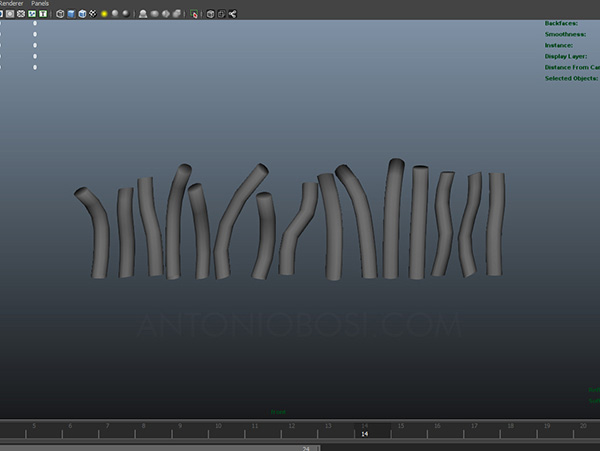
STEP 1: CREATE BASE FILAMENTS FOR CARPET
Create some basic meshes to create the base filaments of your carpet: this is crucial for the overall appeal of your carpet.
You can take inspirations from google to get your personal shape (curly, traight, furry, etc...).
I create these basic shapes using a cylinder primitive then I bent and rotated them a little...just to make them less boring
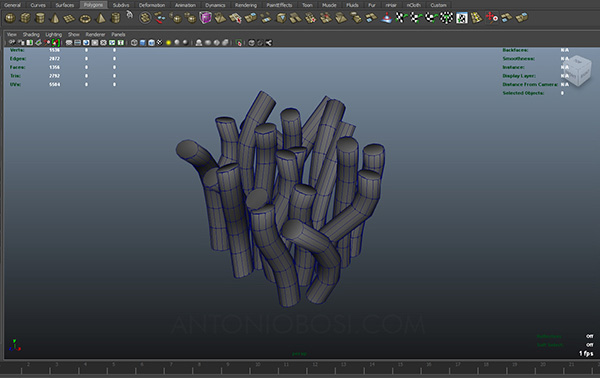
STEP 2: CREATE A CARPET BUNCH
Collect the filaments in a single bunch.
You can make bigger or smaller bunches, this will influence the level of detail of your carpet:
big bunches could make your carpet boring but very fast in render and manipulation,
small bunches will produce very high-detailed carpets but the manipulation and the render time could increase to much.
STEP 2.1: COMBINE ALL AND CREATE A MENTAL RAY PROXY
I advise you to convert the created bunch to mental ray proxy (just take a look at my Maya Mental Ray proxy tutorial),
this will give you many benefits in therms of memory, cpu and system usage.
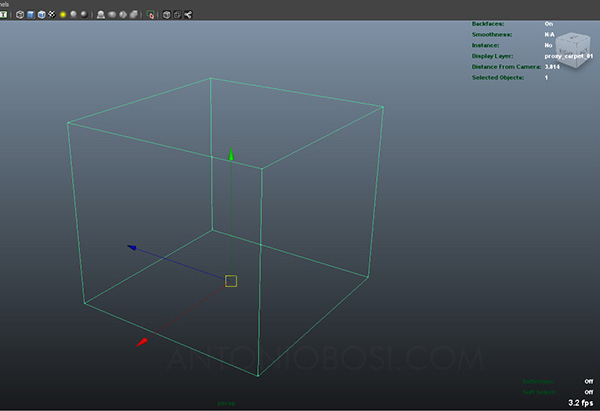
STEP 3: RENAME CARPET BUNCH
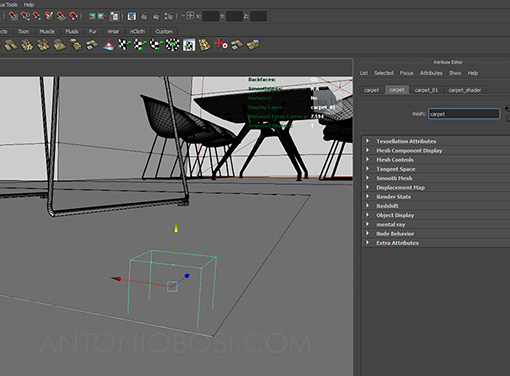
Open your destination scene and import the carpet bunch, be sure to rename the carpet bunch to "carpet" .
This step is essential to make the maya mel script work properly .
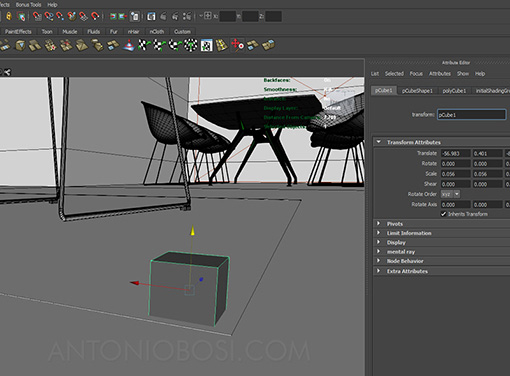
STEP 4: CREATE FIRST ROW OF CARPET BUNCHES
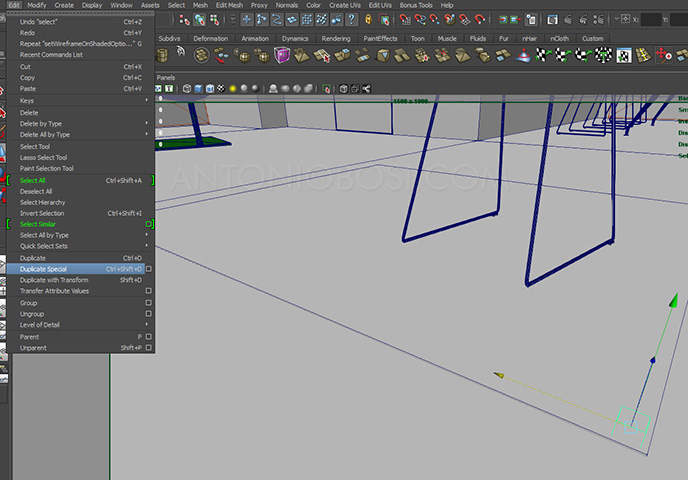
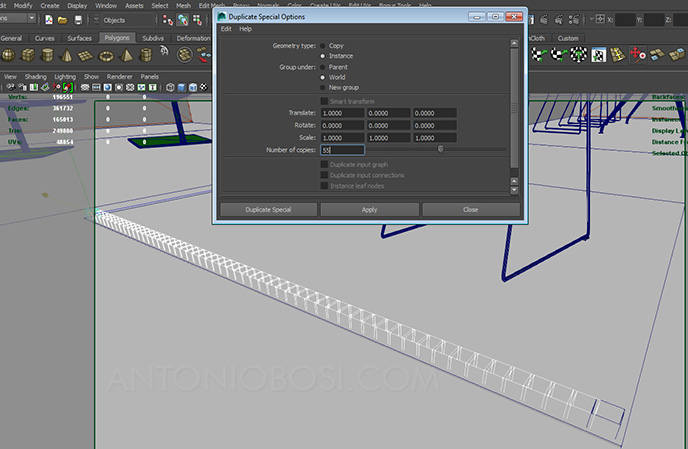
Select the bunch and create the first row using the duplicate special command.
Copy my settings but don't forget to adjust the "translate" and "number of copies" value to match the size of your carpet.
STEP 5: CREATE SECOND ROW OF CARPET BUNCHES
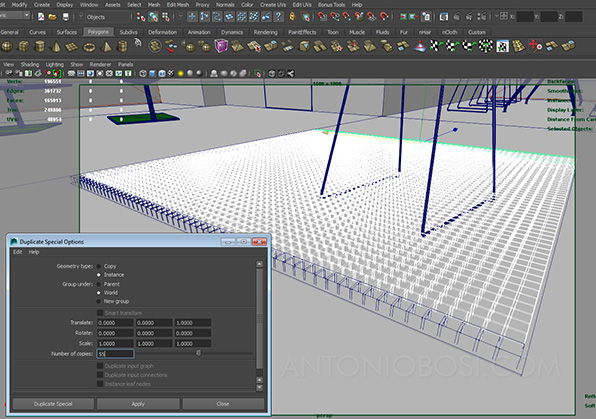
Now select the row you just created and repeat the duplicate special command,
just change the number of copies and the direction (translate value)
STEP 6: RANDOMIZE CARPET BUNCHES
Now the crucial step: randomize the carpet bunches.
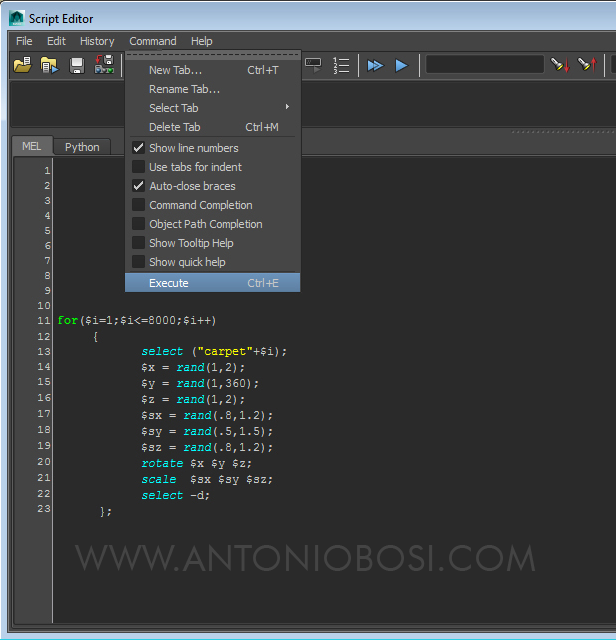
This script will allow you to make a nice looking carpet removing the pattern repetition of the bunches.
1) Select any carpet bunch (it could take some maya thinking time)
2) Open the script editor (WINDOWS --> GENERAL EDITORS --> SCRIPT EDITOR).
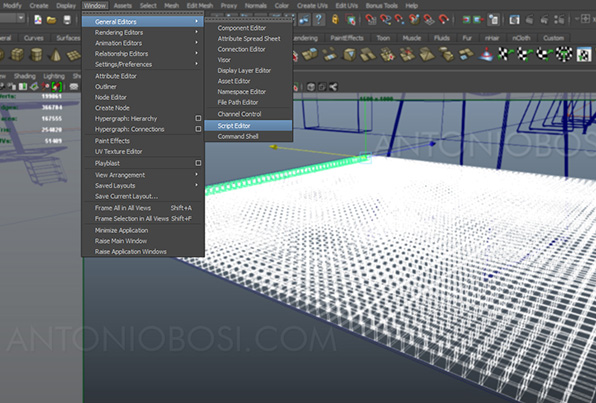
Copy my script in the text area and then COMMAND window --> EXECUTE
This is the result:
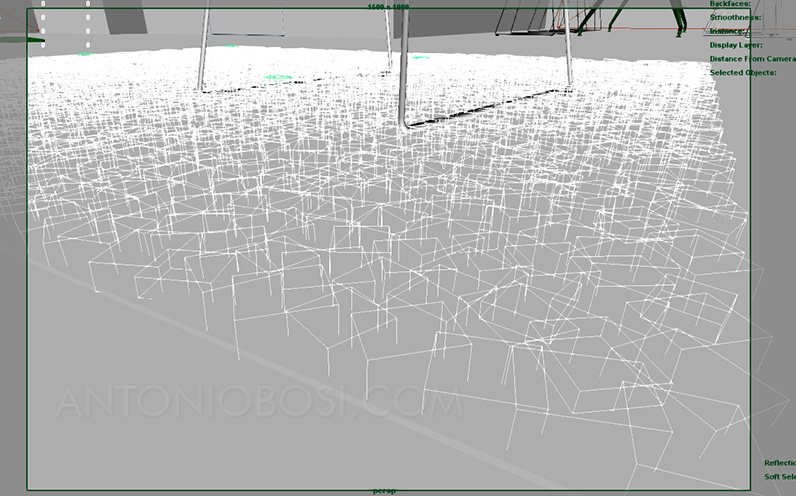
RANDOMIZED MAYA CARPET BUNCHES
STEP 7: ASSIGN A BASIC MENTAL RAY MATERIAL TO THE CARPET
Select the carpet bunches and assign a basic material: I'd go for a mia_material_passes with white diffuse channel, 0 reflections and a bit of transulcency (see the settings below)
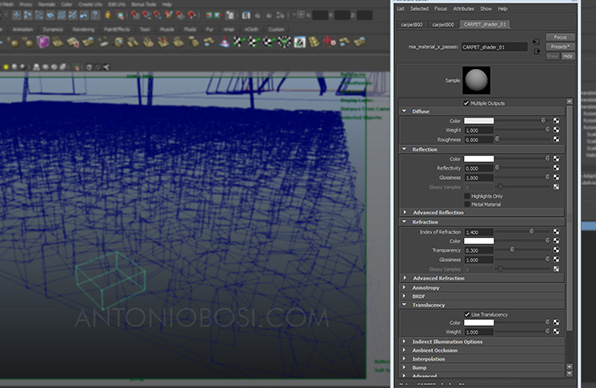
STEP 8: CREATE CARPET BORDER BUNCHES
Create a base bunch for the border of the carpet (using the same filaments you modelled at the beginning of the tutorial) and export them.
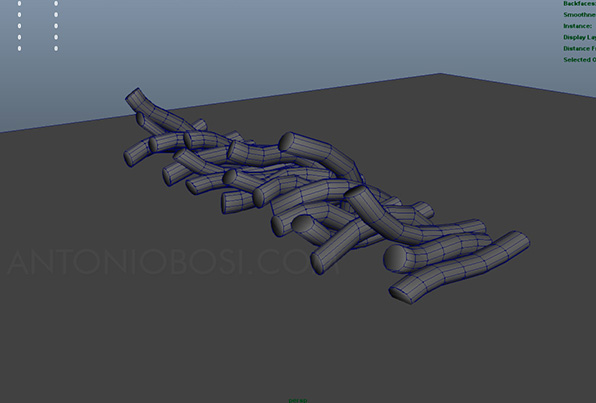
STEP 9: PLACE CARPET BORDER BUNCHES
Place the carpet border bunhes manually and randomize their look (scale and rotation)
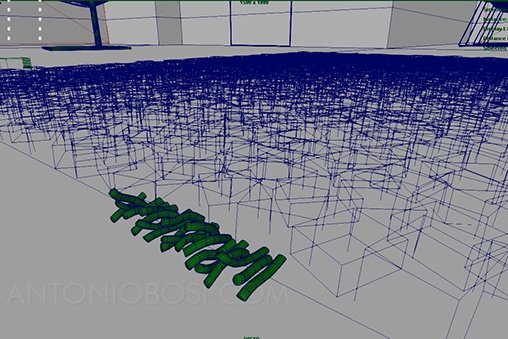
You should get something like that:
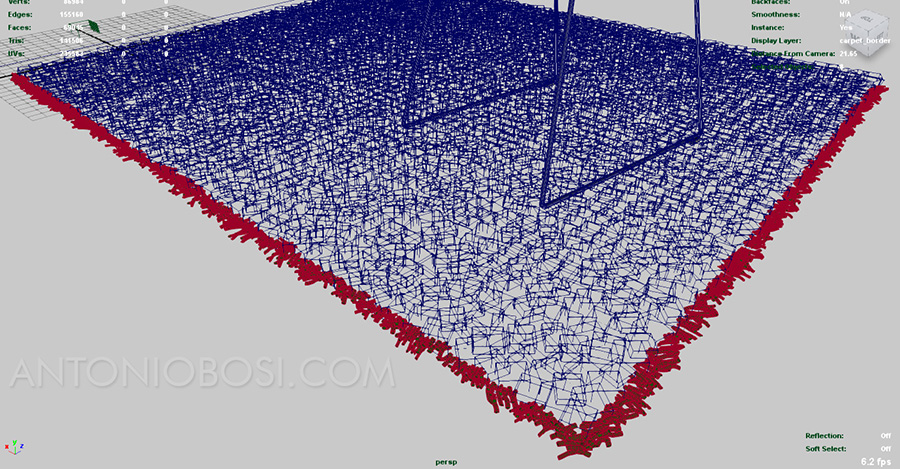
STEP 10: FINAL TOUCHES
Once you finish to create the carpet, just add some objects in the environment to enhance the detail of the overall scene and le jeux sont fait!
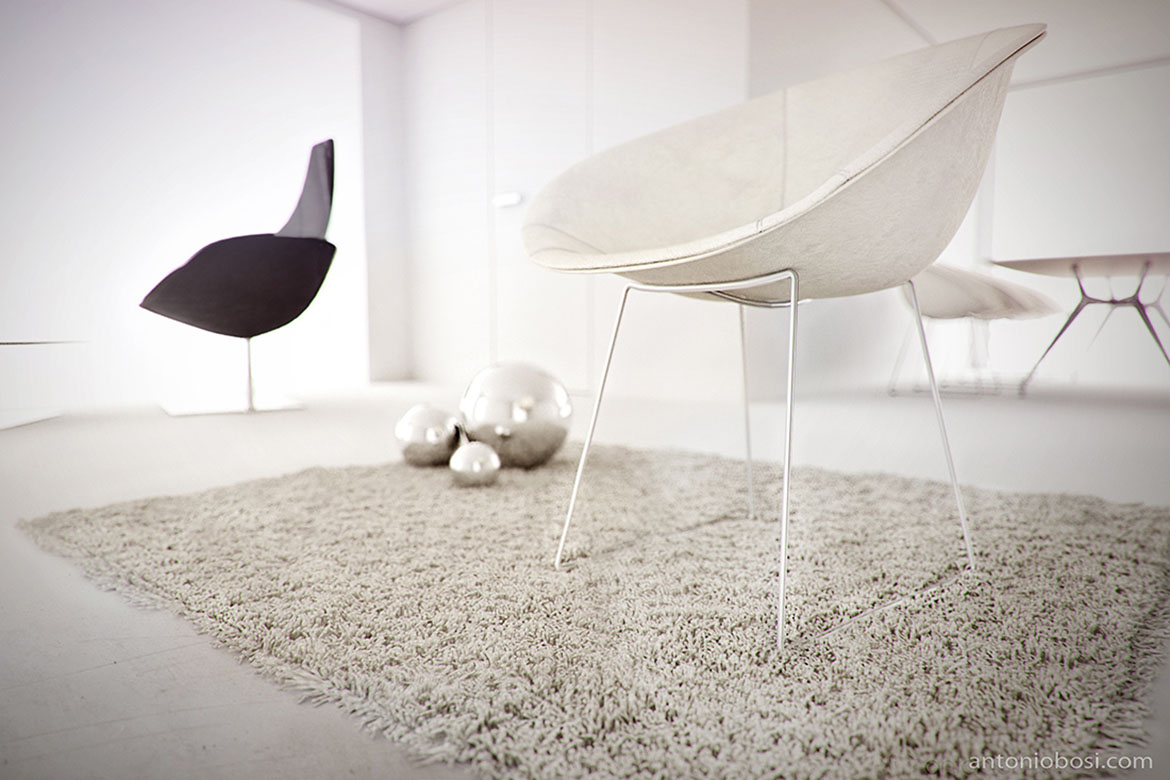
FINAL WORDS:
Creating carpets and rugs in Maya & Mental Ray can be very challenging. The natural way to make them is using maya fur system, but If you don't have a a life time to complete your renders you should consider making carpets with a clever use of polygons, instances and mental ray proxies (as we did in the tutorial above). If you want more detail go with more complicated bunches and filaments... you won't regret making capets with Maya fur!
Happy rendering!
Antonio


33 thoughts on “Create Carpet in Maya Free Tutorial”
I really love this tutorial. So I include your tutorial in my 100 + maya tutorials. You can checkout the blog post if you want. Anyway this is a great tutorial for beginners
Does it works also for vray on maya ?
Yes it works for any render engine.
Hi Antonio.
I use Maya 2017 and i’m a beginner. About “carpet tutorial”, how do you mean by “Collect the filaments in a single carpet patch” ?? Combine all filaments in a single polygon?
P.s.: are you italian?
Hi Andrea, I mean combine all the filaments in a single polygon object.
p.s: yeh I’m an Italian guy 🙂
hello
i think your the king of maya
or your are the lord of maya in the world
i hope you succeed in all part in your life
Amazing! I tried a lot of these tutorials myself!Thanks for this compilation of great tutorials. It really helped me get over the learning for Maya all tools.
For anyone getting the Error “more than one object named carpet 1”, I ran into the same problem and had it fixed after going back to one spot.
When using the duplicate special operation, I had the Geometry type set as copy and Group under as Parent.
Whereas in the image in the tutorial, it’s set as Geometry type: Instance and Group under: World. It worked just fine after that, so hopefully that’s the issue.
thank you!
Hi Antonio,
I’m a GAD student at AIA (game art design)
and I’m learning new things to do on Maya
and I followed your instructions all the way to the “execute” section & then I got this
tinypic.com/r/535xrm/8
I don’t know what to do.
Hi Jamie, are you sure to have done step3 correctly? I see a lot of pCubes in the outliner….
Hi Antonio,
yea I went back to look at it, I corrected the problem now I’m getting the “more then one carpet1” error.
——–IN RESPONSE TO rembolex——–
I know this is two years later but for anyone using this tutorial today, I ran into and fixed the same issue as rembolex had. It was honestly as simple as checking the capitalization.
Yep.
hi antoni,
i’m trying to assign material to the patch and nothing happend’ it’s stay with the lambert grey color Unchanged .
did i miss something in the “export” workflow?
need your help
It seems some kind of bug….it’s a simple material assignment so everything should work fine!
Alright, I experienced the same issue. I went back into my original .ma file and edited the material there and it automatically updated in my proxy scene after I saved over the proxy carpet.mi file.
My guess is that newer versions of Maya have more export settings that enable it to only reference the original file and won’t render a new material on the proxy in any other scene (even though it will allow you to apply them). I don’t know which it is, and updating the original file is a pain, but that’s the only fix I can find.
so i did the execute action but maya gives a error.
Error: line 3: More than one object matches name: carpet1 //
the script is correct. help!!
Hi rembolex, open the outliner and look for more than “carpet1” objects. You should have just objects with names like “capet1 ; carpet2 ; carpet3 ; carpet4; ecc…”
Antonio
okay i did it but still error
so i checked everything in the script editor and i saw that i had the same error when i did duplicate special
I think there’s something wrong in your maya (preferences, plugins or other), because the error is clear “More than one object matches name: carpet1” so you must have another object with that name, you can find in the outliner.
so i did the everything in the tutorial again and it did help, i still get the error but the script is working. thank for the reply btw
😆 hi rembolex
I think u have to try to rename your cubes that have a mental ray proxy connection inside, become like carpet1, carpet2, ecc..
it’s not about carpet.mi
thanks! 😀
😆 😆 thanks
thanks for your TUTORIAL
the only problem is that i can’t see the MEL clearly
can you copy that for us
Hi I cant’ put text mel code in the html web page 🙁 , so I uploaded a better image! Hope you can see it clearly!
Antonio
hi there
many thanks for your stuff.
great week all of you
yuval
Hi all guys, thanks a lot for the support!! It’s much appreciated 🙂
Hope you enjoy this last tutorial, feel free to make any question!! Antonio
Wow, I just have to say, THANK YOU. Yours are not probably, they are the BEST Mental Ray tutorials I’ve seen yet. They’re short, sweet, and to the point. Thank you, a million times thank you, and can’t wait to see what you come out with next!
Hey. Great stuff, you have one of the best renders I’ve seen. Looking forward to see this tutorial.
Thank you.
hey antonio
so how long we need to wait?
your stuff are precious and very valuable.
yuval
HEY MAN. IT’S BEEN QUITE A WHILE EXPECTING FOR YOUR UPDATE OF THIS TUTORIALS MAN.
PLEASE?
Hi Jerry, hope to find some free time soon!